


A Beginner's Guide to a Solar Power System for an RV
Ross AmatoOwning a piece of vacant land is the first step toward building your private getaway. But how do you make that raw land usable and comfortable right away? For many new landowners, the answer is a solar power system for an RV. This self-contained power source on wheels turns your remote property into a functional basecamp, allowing you to enjoy your investment from day one without the noise of a generator or the need for grid access.
This guide will walk you through the essential components of an RV solar system, how to calculate your power needs, and what this all means for a first-time land buyer. An RV equipped with solar power is more than a vehicle—it’s the key to unlocking the full potential of your undeveloped land, making it feel like home from the moment you arrive.

Why Solar Power Is a Game-Changer for Landowners
A solar power system fundamentally changes how you experience your new property. Instead of hauling fuel for a noisy generator or packing up when the sun goes down, you have a silent, reliable source of electricity on demand. This practical advantage opens up a world of possibilities for using and enjoying your land.
- Immediate Usability: You can power lights, charge phones, and run small appliances as soon as you park your RV on the property.
- Long-Term Savings: You can reduce or eliminate the recurring costs of buying, transporting, and storing generator fuel.
- Quiet Enjoyment: You can experience your natural surroundings without the constant drone and exhaust fumes from a generator.
- Energy Independence: You are not tied to utility companies or the grid, giving you complete control over your power supply.
This trend toward self-sufficiency is growing. The global market for RV solar power systems is projected to reach USD 3.5 billion by 2033, with North America accounting for over 35.2% of the market. This is especially true in sunny states where raw land is popular, as more people prioritize energy independence.
Ultimately, a solar power system for an RV is a practical investment in freedom. It empowers you to spend more time on your land, whether for weekend recreation or as the first step toward building a permanent off-grid home. To understand how solar fits into a larger self-sufficient lifestyle, our guide on off-grid living for beginners provides a comprehensive overview.
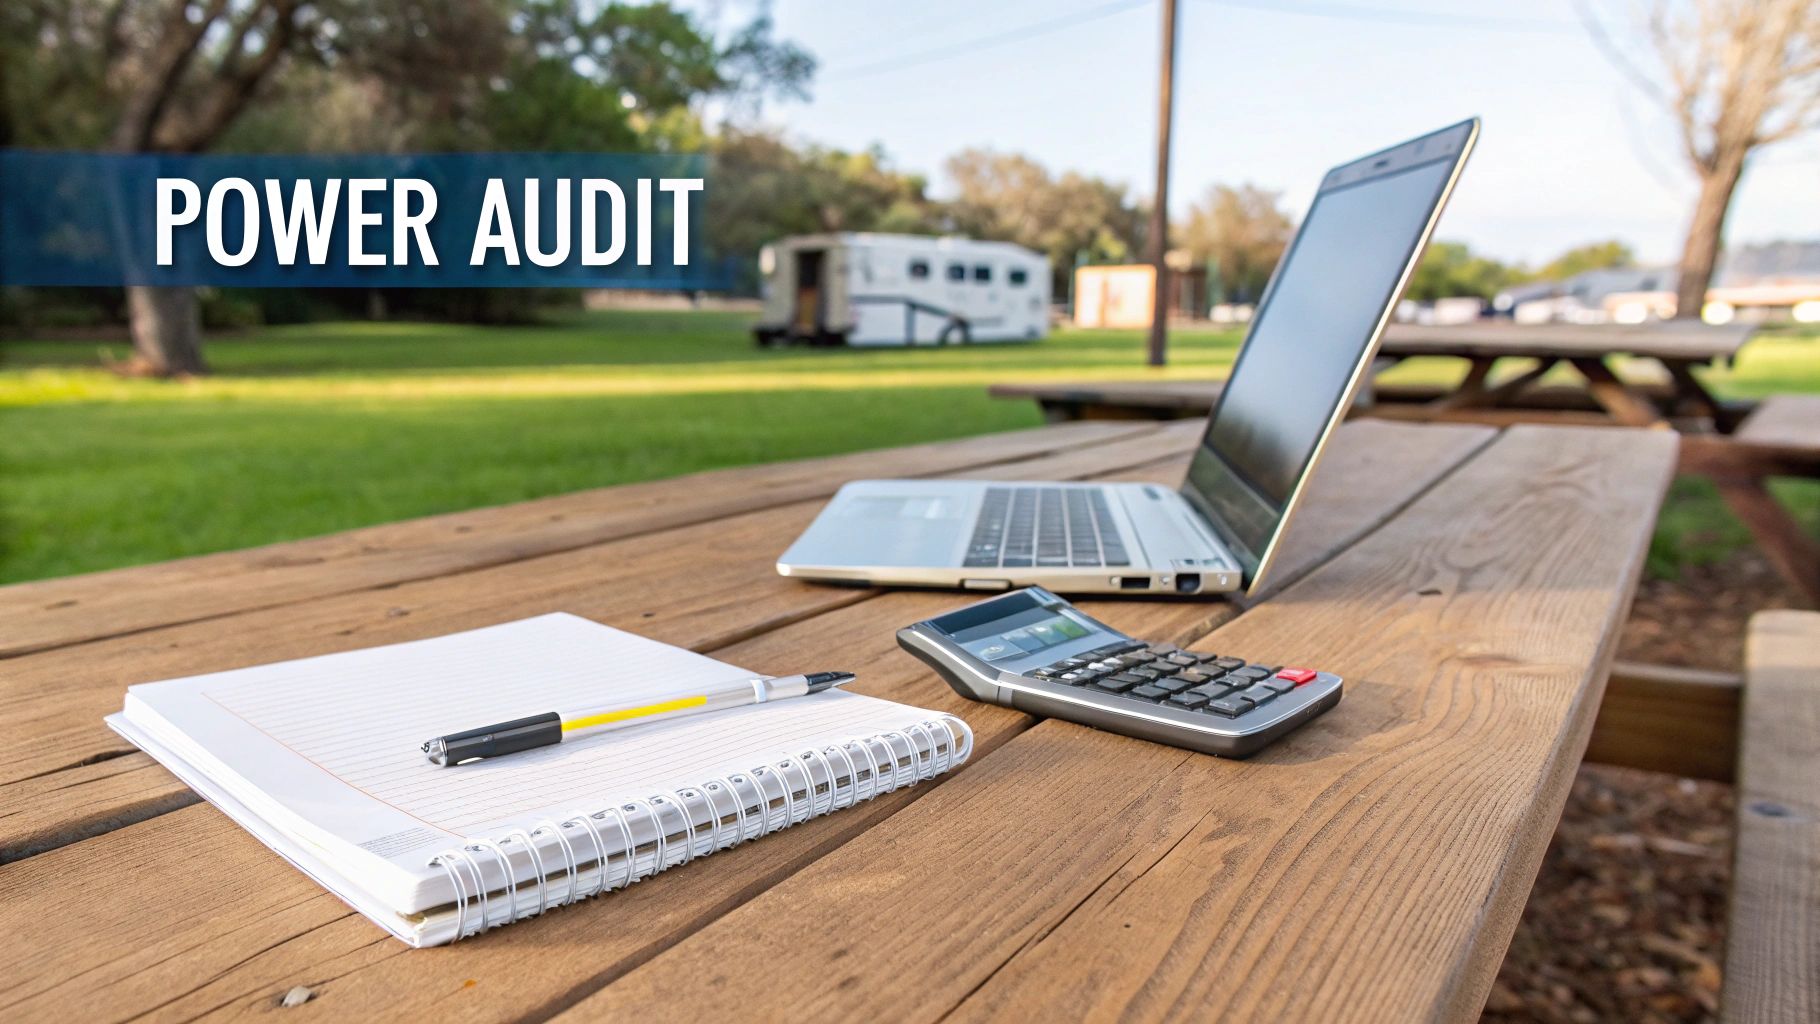
How to Calculate Your Power Needs: An Energy Audit
Before buying any equipment, the first crucial step is to determine how much electricity you actually use. This process is called an energy audit. While it may sound technical, it's a simple inventory of your power consumption. Getting this right is the foundation for designing a solar power system for an RV that meets your needs without overspending on unnecessary components.
A proper energy audit helps you avoid two common mistakes: building a system that’s too small and leaves you without power, or one that’s oversized and costs significantly more than necessary. It begins with listing every device in your RV that uses electricity.
Step 1: List Every Electrical Device
Using a notepad or spreadsheet, walk through your RV and list everything that plugs into an outlet or is hardwired to your 12-volt (12V) system. Remember to include small devices, as their power consumption can add up.
A typical list might include:
- Interior LED lights
- Water pump
- 12V Refrigerator
- Phone and laptop chargers
- Television
- Coffee maker or microwave
- Ventilation fans
Be as thorough as possible. Think about a typical day on your property—what will you actually be using from morning until night?
Step 2: Find the Power Draw in Watts
Next, determine how many watts (W) each device consumes. This information is usually found on a small label on the device, its power adapter, or in the owner's manual.
If the label only lists amps (A) and volts (V), you can calculate the wattage using a simple formula: Watts = Volts x Amps. Most RV DC appliances run on 12V, while AC appliances (those that plug into a standard outlet) use 120V.
Step 3: Estimate Your Daily Hours of Use
This step requires an honest assessment of your habits. For each item, estimate how many hours you will realistically use it each day. For example, a coffee maker might run for 10 minutes (about 0.17 hours), while a refrigerator compressor may cycle on and off for a total of 8 hours over a 24-hour period.
The more accurate your estimates, the more effective your final system will be.
Key Takeaway: The goal of this audit is to calculate one number: your total daily energy consumption, measured in watt-hours (Wh). This figure will guide every decision about your solar panels, batteries, and other equipment.
Step 4: Calculate Your Total Daily Watt-Hours
The final step is to calculate the daily watt-hours for each device by multiplying its wattage by the estimated hours of use.
Formula: Watts x Hours of Use = Daily Watt-Hours (Wh)
For example, six 3W LED lights running for 5 hours would consume 90 Wh (18W x 5h). Complete this calculation for every item on your list.
Once you have the watt-hours for each device, add them all together. This grand total is your estimated daily power need—the minimum amount of energy your solar system must generate and store each day. For more context on powering a remote property, our guide on off-grid power solutions offers additional insights.
Hypothetical RV Daily Power Consumption Audit
Here is a hypothetical example of what a power audit might look like for an RV owner.
| Appliance / Device | Power (Watts) | Daily Hours of Use | Total Watt-Hours (Wh) per Day |
|---|---|---|---|
| 6 LED Lights | 18 W (3W each) | 5 hours | 90 Wh |
| Water Pump | 60 W | 0.5 hours | 30 Wh |
| Laptop Charging | 65 W | 4 hours | 260 Wh |
| Phone Charging (2) | 20 W (10W each) | 3 hours | 60 Wh |
| MaxxAir Fan (low) | 12 W | 8 hours | 96 Wh |
| 12V Refrigerator | 55 W | 8 hours (cycling) | 440 Wh |
| Daily Total | 976 Wh |
Based on this hypothetical audit, the user needs to generate and store approximately 976 Wh each day. It is generally recommended to add a 20% safety buffer to account for cloudy days and system inefficiencies, bringing the actual target to about 1,171 Wh.
With this number, you can confidently begin selecting the right components for your system.
Choosing the Right Solar Components for Your Land
After completing your energy audit, the next step is selecting the equipment for your solar power system for an RV. A system is comprised of four key components that must work together: solar panels, batteries, a charge controller, and an inverter.
Think of it as a team: the solar panels produce the power, the batteries store it, the charge controller manages the flow, and the inverter converts it for use by your appliances. A well-synchronized system ensures reliable power, no matter how remote your property is.
Solar Panels: Monocrystalline vs. Polycrystalline
Solar panels capture sunlight and convert it into usable DC electricity. For RV applications, there are two primary types of rigid panels to consider.
-
Monocrystalline Panels: Made from a single silicon crystal, these panels have a uniform black color. They are more efficient, especially in low-light conditions, and perform better in high temperatures—a significant advantage for landowners in sunny climates. While they have a higher initial cost, their efficiency means you need less surface area to generate the same amount of power.
-
Polycrystalline Panels: Made from multiple silicon fragments, these panels have a blue, marbled appearance. They are less expensive but are not as efficient as monocrystalline panels and do not perform as well in high heat.
For most individuals buying land in sunny states like Arizona, Nevada, or New Mexico, monocrystalline panels are typically the better choice. Their superior performance in sun and heat often justifies the higher initial cost.
Batteries: Lead-Acid vs. Lithium
The battery bank is the core of your system, storing energy collected by the panels for use at night and on cloudy days. Your choice of battery technology will significantly impact your system's performance, lifespan, and overall weight.
The main options are traditional lead-acid batteries and modern lithium iron phosphate (LiFePO4) batteries. Lead-acid batteries (including AGM types) have a lower upfront cost, but you can only safely use about 50% of their rated capacity. They are also very heavy and have a shorter lifespan.
Key Insight: LiFePO4 batteries are a significant upgrade for anyone planning to spend extended time off-grid. They are about half the weight of lead-acid, can be safely discharged to 80-90% of their capacity, and can last for 3,000-5,000 charge cycles. This often translates to over a decade of reliable power.
While lithium batteries have a higher initial cost, their longer lifespan and superior performance make them a more economical investment over the long term.
Charge Controllers: PWM vs. MPPT
A charge controller sits between the solar panels and the batteries, regulating the voltage to prevent overcharging. The two main types are Pulse Width Modulation (PWM) and Maximum Power Point Tracking (MPPT).
-
A PWM controller is a simpler, less expensive option that works like a switch. It is a suitable choice for small, basic systems.
-
An MPPT controller is a more advanced technology that matches the panel's output to the battery's voltage, maximizing power extraction. It can increase energy harvest by up to 30%, especially in cold weather or when batteries are low. For a robust solar power system for an RV on a rural lot, an MPPT controller is almost always worth the additional cost.
Inverters: Pure Sine Wave vs. Modified Sine Wave
The inverter converts 12V DC power from your batteries into 120V AC power, which is needed for appliances like laptops, coffee makers, and microwaves.
-
Modified Sine Wave Inverters: This is the budget-friendly option. They produce a blocky electrical wave suitable for simple devices but can damage sensitive electronics.
-
Pure Sine Wave Inverters: These produce clean, high-quality electricity that is identical to or better than grid power. For any serious off-grid setup, a pure sine wave inverter is essential to safely run modern appliances.
The demand for these systems reflects a broader trend; the RV solar panels market is projected to reach USD 1.42 billion by 2035. You can read more about the growth and trends in the RV solar market to understand how the industry is evolving.
Comparing Key RV Solar Components
This table summarizes the main component options to help you decide what is most appropriate for your budget and intended use of your land.
| Component | Option 1 (Budget-Friendly) | Option 2 (High-Performance) | Key Consideration for Landowners |
|---|---|---|---|
| Solar Panels | Polycrystalline | Monocrystalline | Monocrystalline performs better in the high heat common on rural Western lots. |
| Batteries | Lead-Acid (AGM) | Lithium (LiFePO4) | Lithium offers a longer lifespan and more usable power, ideal for extended stays. |
| Charge Controller | PWM | MPPT | MPPT extracts more power from your panels, crucial for maximizing charging on all days. |
| Inverter | Modified Sine Wave | Pure Sine Wave | Pure Sine Wave is essential for safely powering sensitive modern electronics and appliances. |
Choosing high-performance components may have a higher upfront cost but provides the reliability and longevity needed for a truly self-sufficient setup on your land.
Installation Basics and Safety
With your components selected, the next phase is installation. This process involves two main steps: physically mounting the solar panels and safely wiring the system. Whether you do it yourself or hire a professional, understanding the basics is important for ensuring your system operates efficiently and withstands the elements.
This diagram illustrates the flow of power in a standard RV solar setup.
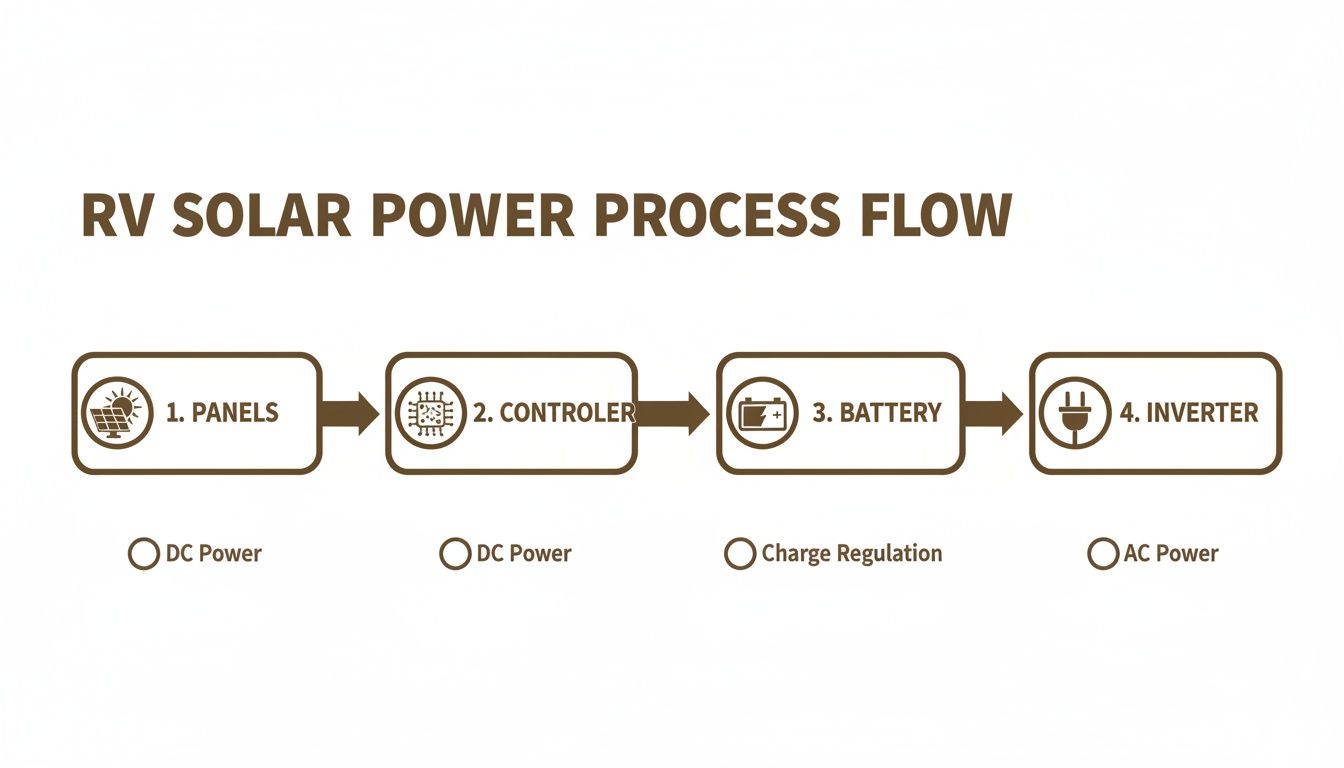
Energy flows from the solar panels, through the charge controller, into the batteries for storage, and is finally converted by the inverter for use by your AC appliances.
Mounting Your Solar Panels
The method used to attach panels to your RV affects both performance and the structural integrity of your vehicle.
- Drilled Mounts: Bolting brackets directly into the RV roof provides a secure, permanent installation. It is critical to use a quality lap sealant around every hole to prevent leaks.
- Adhesive Mounts: Using Very High Bond (VHB) tape with specialized mounting feet is a strong alternative that avoids drilling. This method requires a large, clean surface for the adhesive to bond effectively.
- Flexible Panels: These lightweight panels can be glued directly to the roof for a low-profile look. However, they are generally less efficient because heat can become trapped underneath and are typically less durable than rigid panels.
- Portable Ground Arrays: A portable "suitcase" system is an excellent option for land use. It allows you to park your RV in the shade while placing the panels in direct sunlight, and you can easily tilt them to optimize sun exposure.
Wiring: Series vs. Parallel
After mounting the panels, you must connect them before running wires to the charge controller. The two methods are series and parallel connections, and your choice will affect your system’s voltage and amperage.
Important Note: Periodically check all electrical connections. Temperature fluctuations can cause terminals to loosen over time, creating resistance that reduces charging efficiency. Tightening connections is a simple but important maintenance step.
Series connections link panels positive-to-negative, which adds their voltages together while keeping the amperage the same. This approach is beneficial for long wire runs as it minimizes power loss.
Parallel connections link all positive terminals together and all negative terminals together. This keeps the voltage constant while adding the amperage from each panel. This method can offer better performance if one panel is partially shaded.
Essential Safety Measures
Safety is the top priority when working with electricity. Several components are essential for protecting both you and your equipment.
Using the correct wire gauge (thickness) is critical to prevent overheating and power loss. Fuses or circuit breakers must be installed in key locations: between the controller and batteries, and between the batteries and inverter. Selecting appropriate safety fuses is a small but critical step that protects your system from overcurrents.
Finally, always install a master disconnect switch on the positive line from your battery bank. This allows you to safely shut down the entire system for maintenance or in an emergency.
What This Means for First-Time Land Buyers
For a first-time land buyer, a well-planned solar power system for an RV is what makes your property immediately useful. It transforms a vacant lot from an abstract investment into a functional basecamp for recreation or future development projects.
This setup provides true independence from the electrical grid. You can power tools to clear land, keep devices charged for communication and safety, and have light after sunset. A solar-powered RV makes even the most remote properties feel accessible and livable from day one, turning the dream of land ownership into a practical reality. Understanding your power needs is an important early step, and if you're new to the process, our guide on what to look for when buying land is a great resource.
The market for off-grid RV solar systems is expanding at a compound annual growth rate of 11.44%. A significant driver of this growth is the solar generator market, which is projected to increase from $677 million in 2026 to $1.17 billion by 2034. These systems enable users to stay on their land for 5-7 days per charge. You can discover more insights about RV off-grid solar systems on Data Insights Market for more details on these trends.
The Real-World Impact: An RV with a reliable solar setup functions as an instant off-grid cabin. It provides the essentials—light, refrigeration, and power for devices—that make your property enjoyable and safe from the very beginning. It effectively bridges the gap between raw land and a true getaway.
Why Consider Dollar Land Store?
Before setting up a solar power system for an RV, you need the right piece of land. Dollar Land Store simplifies the process of finding and acquiring that land, especially for first-time buyers. We specialize in affordable, undeveloped rural and recreational land, offering a blank canvas for your off-grid projects.
Our focus is on making land ownership accessible. The seller-financing process at Dollar Land Store is designed to be straightforward, transparent, and free of the complexities often found in traditional real estate transactions.
Here is what that means for a buyer:
- Affordable Land with Low Monthly Payments: Our model allows you to acquire land with a low down payment and manageable monthly payments, freeing up capital for your solar setup and other improvements.
- Simple Seller-Financing with No Credit Checks: We do not perform credit checks, making land ownership accessible to a wider range of buyers.
- Transparent Terms and Disclosures: Our process is handled directly, with no agents or middlemen. All terms are clearly disclosed, so you know exactly what to expect.
- Fast Contract Setup: Our streamlined online process allows you to secure your property quickly and efficiently.
This simple approach lets you focus on planning your future on your new land. You can learn more about our process in our guide on how to finance a land purchase.
Buyer Guidance and Next Steps
As you plan for your land purchase and off-grid power setup, it's important to ask the right questions and do your due diligence. A solar-powered RV is an excellent tool, but it's just one part of the bigger picture of land ownership.
Here are some next steps to consider:
- Define Your Goals: Clarify how you intend to use your land. Will it be for weekend camping, a long-term basecamp, or future construction? This will influence both the type of land you buy and the size of the solar system you need.
- Perform an Energy Audit: Use the steps outlined in this guide to calculate your daily power needs. This is the most important step in designing a system that works for you.
- Evaluate Land Independently: Remember that zoning, access, taxes, and permitted uses vary by county. Always verify all property details directly with local authorities before purchasing.
- Explore Your Options: Take time to browse available properties and financing options to find what best fits your budget and vision.
Conclusion
A solar power system for an RV is a powerful tool for any new landowner. It provides the energy independence needed to make a vacant property comfortable and functional from the start. By carefully calculating your power needs and selecting the right components, you can build a reliable system that allows you to fully enjoy the peace and freedom of your own land.
This technology bridges the gap between owning a raw parcel and creating a true personal retreat. With a clear understanding of the process, you can confidently take the next steps toward building your off-grid haven.
Contact Dollar Land Store with questions about buying raw land.